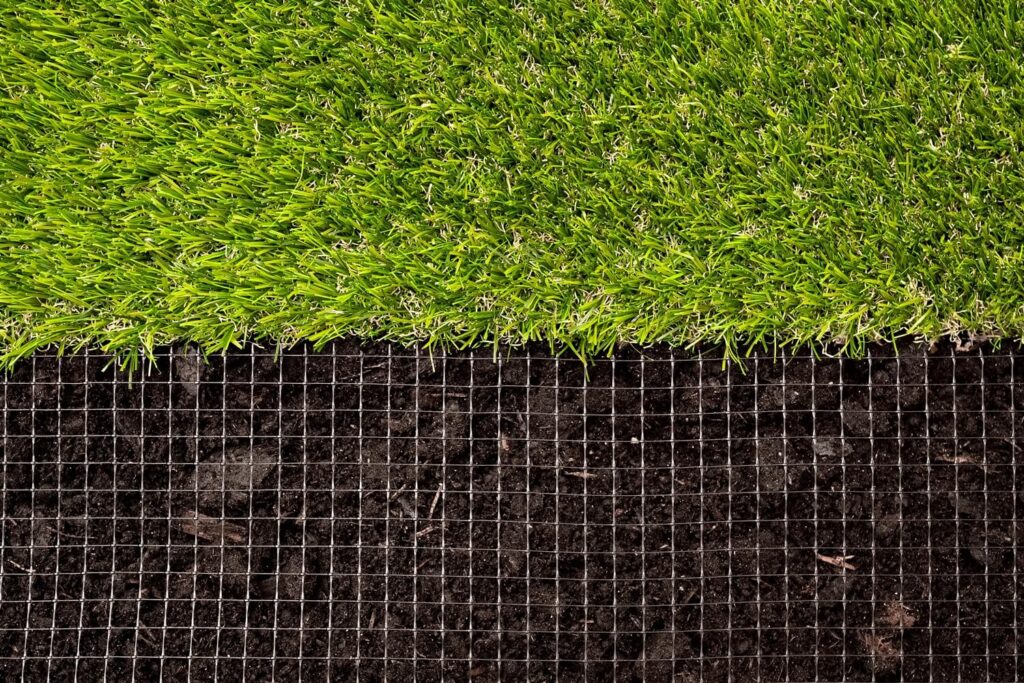
In many gardens, mole and vole problems appear suddenly – just yesterday the lawn looked perfect, and today there are a few fresh mounds. Owners often first try home remedies: sonic repellents, scented products, or traps. In practice, however, such solutions only work temporarily. The animals can quickly move several meters away and return to their tunneling. Therefore, mechanical solutions, such as mole netting installed beneath the lawn surface, are increasingly being chosen. This creates a barrier in the soil, preventing the animals from emerging to the surface and creating mounds. What is the cost? mole nets, how many centimeters underground Should it be buried and what should you pay attention to? Find out by reading our post!
Mole net for the garden It’s a durable plastic grid that’s placed under the entire lawn or within selected green areas to prevent rodents from pushing up soil. It doesn’t repel animals with scent or sound, but acts as a mechanical barrier, so its effectiveness isn’t dependent on weather or pest activity. It’s a long-term method because, when properly installed, mole net remains in the ground for years. Below we present advantages and disadvantages this solution:
| Advantages | Defects |
|
|
The effectiveness of this solution depends largely on proper installation. Placing the protection too shallow or too deep can result in animals still being able to create tunnels and push the soil to the surface. Therefore, before starting work with mole net it’s worth knowing, at what depth it works best and what its correct arrangement looks like in the case of a rolled or seeded lawn.
The greatest effectiveness mole and vole net is achieved when it is laid relatively shallow below the lawn surface. How deep So where should it be placed? In practice, the optimal installation depth is usually around 5–10 cm underground. This allows the animal, which tunnels just beneath the turf, to encounter the barrier before it pushes the soil to the surface and creates a mound. If the mesh is installed too deep, the mole can tunnel above it and continue damaging the lawn.
In practice, a small margin of error is permissible during installation—usually a few centimeters up or down—but the closer to the optimal depth, the more effective the protection will be. Substrate preparation and terrain also play a significant role. On sloped or uneven plots, or in areas where the ground is raised or lowered, the optimal depth may vary. During installation, it’s worth monitoring the soil layer to ensure the mesh doesn’t sit too shallow in one spot and too deep in another.
It’s best to plan the installation of mesh while the lawn is being established, either by seed or by roll, or while preparing flowerbeds and other green areas. Subsequent adjustments could prove much more difficult and costly.
For a rolled lawn, the mesh is laid out on a level surface, then covered with a thin layer of soil, and then the turf is laid on top. For a lawn established from seed, it is best to place the mesh on the prepared surface and cover it with a layer of soil a few centimeters thick, into which the grass seeds are then sown. In both cases, it is important to lay it evenly, maintain overlaps between the strips of material (usually about 10–15 cm), and stable attachment to the ground. This will prevent animals from getting between the mesh sections, and the entire lawn area will remain effectively protected.
Installing a mole net begins with thorough ground preparation. First, remove any stones, roots, and larger clods of soil, then level and lightly compact the ground. Strips of netting are laid out on the prepared surface, overlapping the mesh by several centimeters to prevent the animals from escaping through the gaps. If necessary, the netting can be secured to the ground with special garden pegs. The next step is to cover it with a thin layer of soil—usually about a few centimeters—separating the netting from the turf. Only then, after this preparation, is the grass roll laid, pressed into the ground and watered to promote rooting.
Installing mole netting over an existing lawn is possible, but in practice, it’s significantly more difficult than securing the area before laying new turf. To lay the material at the correct depth, you must first remove the lawn layer or topsoil, then spread the material and re-create the entire surface. This means more work, higher costs, and the risk of temporarily damaging the lawn’s appearance after the work is completed. For this reason, this solution is primarily used when the garden has already been severely damaged by moles and major resurfacing, reseeding, or complete grass replacement are planned. If the lawn is in good condition and the problem has only just arisen, owners often resort to emergency measures first, postponing the installation of the netting until a future garden renovation.
It must therefore be clearly emphasized that in the case of an existing lawn, it is usually impossible to install a mesh without interfering with the turf — for the solution to be effective, it is usually necessary to at least partially remove the grass and re-prepare the ground.
Using mole netting doesn’t preclude planting in the garden. For flowerbeds or areas where planting is planned, small cross-shaped incisions are made in the netting. This allows for easy digging and planting, while still protecting most of the soil surface from mole activity. This solution is used, among other things, when planting ornamental shrubs, perennials, and small trees.
It’s important, however, to make the cuts in the mesh as small as possible and only in the areas where planting is planned. This allows for the continuity of the protective barrier in the rest of the garden. Plant roots easily grow through the mesh or the cuts, so its presence in the soil shouldn’t hinder the proper development of the root system. This allows you to simultaneously protect your lawn from moles and carry out gardening tasks related to planting without interruption.
The mesh allows water to freely penetrate the lower layers of the soil, so with proper installation, the lawn can still be watered evenly. However, it’s important to remember that it’s best to plan the irrigation system and rodent protection in parallel, even before the lawn is established. Typically, the soil is first prepared and irrigation system components, such as pipes and sprinklers, are positioned, and then the mesh is adjusted to avoid hindering future maintenance. If repairs or reconstruction of the system are necessary in the future, the presence of the mesh in the ground may require localized cutting and re-sealing.
Choosing the right mole netting depends primarily on the size of the area being protected and the technical parameters of the material. Roll dimensions 1 × 100 m is a good solution for both small gardens and larger green areas. In turn, the variant 2 × 100 m allows for faster protection of large surfaces, because one roll can cover a much larger area.
Mesh size is also an important parameter, which for nets used under lawns is typically around 12 x 12 mm. They effectively block moles from pushing up soil without restricting the flow of water, air, or minerals in the soil. This allows the grass’s root system to develop naturally.
The material used is equally important. Meshes designed for underground installation are typically made of durable polypropylene, which is resistant to UV radiation, moisture, fertilizers, and soil chemicals. This prevents them from decomposing too quickly and can effectively protect your lawn for many seasons.
Many people wonder how much it costs to secure a garden this way. The price depends primarily on the size of the area, the type of mesh, and the method of installation. Therefore, it’s worth checking the material’s cost per square meter and the budget for gardens of various sizes.
The price of mole netting depends primarily on the width of the roll and the area it needs to protect. Sammler offers rolls of, among others: 1 × 100 m allowing to protect approximately 100 m² of lawn, as well as a variant 2 × 100 m COMPACT allowing the protection of up to 200 m² of surface with one roll. You can find their current prices here.
When installing pest control yourself, the most important thing is the cost is the purchase of the net and possible mounting pins.
Example costs of garden security with self-assembly in the garden:
Mole netting is one of the most affordable methods for protecting your lawn from molehills. The one-time installation cost is minimal compared to the costs of repairing a damaged lawn, leveling the ground, or re-sowing the lawn.
Mole netting is one of the most effective methods of protecting your lawn from mounds and turf damage. It’s most effective when planned during the garden installation phase or when replacing the lawn. Proper installation—approximately 5–10 cm below the ground, with the overlaps between the strips of netting—creates a durable barrier that prevents the animals from pushing soil up to the surface. Although netting is an additional expense when installing a lawn, in the long run, it’s an investment that allows you to avoid numerous repairs, reseeding, and re-leveling after mole activity. Therefore, in gardens where moles are a regular problem, installing netting under the lawn will often be the most durable and cost-effective solution.
If you are planning to install a new lawn or modernize your garden, check out the available solutions in the Sammler offer. Here you’ll find mole nets in a variety of widths, allowing you to effectively protect both small home gardens and larger green spaces.
EFFECTIVE, DURABLE AND ECOLOGICAL
LAWN PROTECTION AGAINST MOLE

Products 100%
recycled

Certified
quality

Individual
approach


 EN
EN  PL
PL  DE
DE  RO
RO  RU
RU  UK
UK